



Lâmpada Zerynth: Controle Inteligente de Luz Ambiente IoT com LEDs NeoPixel
Componentes e Materiais
| Zerynth Shield | 1 |
| Arduino Due | 1 |
| STM32 Nucleo ST NUCLEO | 1 |
| Particle Photon | 1 |
| UDOO DUAL | 1 |
| Adafruit NeoPixel | 1 |
Aplicativos e Serviços Online
- Zerynth Studio
- Zerynth App
Sobre o Projeto
Padrões sem fio de baixa potência combinados com LEDs de custo ultrabaixo, sensores e dispositivos de comunicação em miniatura tornaram a iluminação inteligente um catalisador para a Internet das Coisas e automação residencial.
Neste tutorial, veremos como controlar uma faixa de LED NeoPixel via mobile usando o Zerynth App, que mostra um seletor de cores e um menu para seleção de várias animações pré-configuradas.
Passo 1: Material Necessário


O projeto requer poucos elementos:
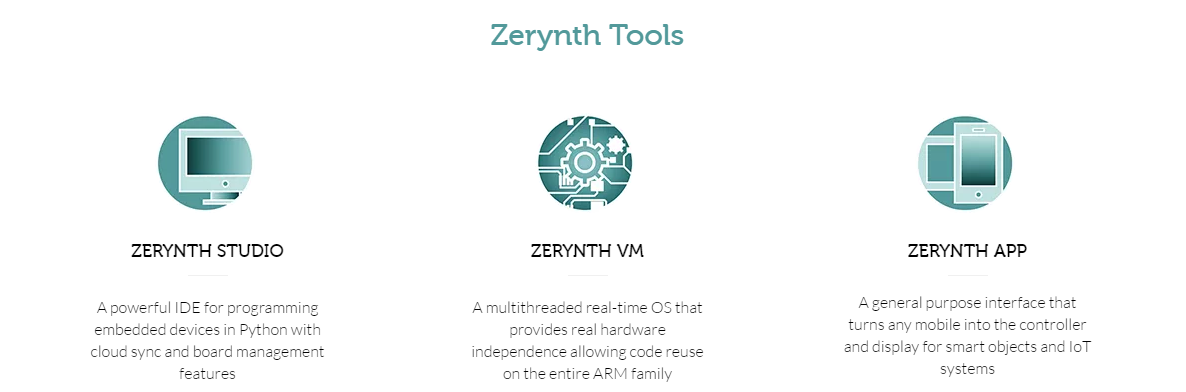
- Zerynth Studio: ambiente de desenvolvimento Python multiplataforma e baseado em navegador com sincronização na nuvem e gerenciamento de placas. Não importa qual SO você use, o Zerynth roda! Baixe e instale o Zerynth (https://www.zerynth.com/zerynth-studio/).
- Zerynth App: a interface móvel Zerynth para objetos inteligentes e sistemas IoT. Qualquer celular se torna o display e controle remoto do objeto. Download: https://www.zerynth.com/zerynth-app/
- Zerynth Shield (disponível aqui). Uma placa multi-sensores pronta para uso que adiciona funções inteligentes aos seus objetos do dia a dia.
- Arduino DUE ou ST Nucleo F401RE ou Particle Photon ou UDOO ou Flip&Clip da Mikroelektronika. Não importa qual placa você use, o Zerynth é compatível com múltiplas placas! Você pode encontrar todos os detalhes das placas suportadas aqui.
- Se não usar Particle Photon (que tem módulo WiFi onboard), você precisará de um elemento que conecte a placa à web, como o WiFi Shield da Adafruit. Porém, você pode usar qualquer outro adaptador que monte o chip WiFi CC3000 Texas Instruments (https://www.ti.com/product/cc3000).
- Uma faixa (ou anel) de LEDs NeoPixel da Adafruit (disponível aqui).
- Um abajur de vidro ou impresso em 3D. A escolha é sua.
Passo 2: Montagem

- Apenas encaixe o WiFi Shield e o Zerynth Shield no seu Arduino (ou ST Nucleo ou UDOO). Se usar Particle Photon, apenas encaixe-o nos conectores dedicados no Zerynth Shield.
- Conecte os LEDs NeoPixel à porta relacionada no Zerynth Shield.
- Coloque todas as placas e os LEDs dentro do Abajur.
Passo 3: Programação

Usar o Zerynth é muito fácil!
- Conecte e "virtualize" sua placa (já explicado aqui)
- Crie um novo projeto no Zerynth (já explicado aqui). Atenção: você precisa criar 3 (+1) arquivos: main.py, animation.py, template.html (e project.md)
- Copie o código postado
- Faça uplink do código na sua placa e pronto!
Após ligar a lâmpada, ela se conectará automaticamente à rede pré-configurada.
Depois, abra o Zerynth App, que buscará objetos Zerynth conectados à rede, selecione o objeto de interesse, neste caso "Zerynth Lamp", e você pode interagir com ele! Neste caso, o Zerynth App mostra um seletor de cores e um menu para seleção de várias animações pré-configuradas.
O código é muito simples e tem muitos comentários. Para dúvidas ou sugestões, sinta-se à vontade para postar nos fóruns da comunidade Zerynth: https://community.zerynth.com/
Passo 4: Torne o IoT Mais Brilhante!

Gostou? Vamos ficar hardcore!
O Zerynth Shield apresenta um conjunto de sensores e atuadores, incluindo sensores para detecção de toque, LED infravermelho, microfone, sensor de luz e sensor de temperatura. Você pode partir deste código de exemplo simples para desenvolver o comportamento que preferir. Use o Zerynth Shield para estender as funcionalidades da Lâmpada!
Luigi F. Cerfeda (@L_F_Cerfeda) - Equipe Zerynth
Código
main.py
################################################################################
# Zerynth Lamp
# Created by Zerynth Team 2015 CC
# Authors: G. Baldi, D. Mazzei
################################################################################
# import needed modules
import streams
from bcm43362 import bcm43362 as wifi_driver
from wireless import wifi
import animation
from toishield import toishield
# and import the zerynthapp module
from zerynthapp import zerynthapp

streams.serial()

# connect to a wifi network
try:
    wifi_driver.auto_init()
    print("Establishing Link...")
    wifi.link("SSID", wifi.WIFI_WPA2, "password")
    print("Ok!")
except Exception as e:
    print(e)

# save the template.html in the board flash with new_resource
new_resource("template.html")

#### ZerynthApp Setup
# :: Javascript to Python ::
# the following functions will be called when buttons are pressed
def change_color(r, g, b):
    animation.setup_color(r, g, b)

def change_animation(n):
    animation.setup_anim(n)

def change_speed(n):
    animation.setup_anim_speed(n)

# configure the Zerynth app with a name, a description and the template url
vp = zerynthapp.ZerynthApp("Zerynth Lamp", "Try me!", "resource://template.html")

# everytime Javascript generates events the corresponding functions are called
vp.on("change_color", change_color)
vp.on("change_animation", change_animation)
vp.on("change_speed", change_speed)

# run the ZerynthApp!
vp.run()

# since vp.run starts a new thread, you can do whatever else you want down here!
# let's control leds
animation.start(D6, 24)
template.html
<html>
<head>
<zerynth/>
<zerynth-jquery/>
<zerynth-jquery-mobile/>
<zerynth-jqwidgets/>
<meta name="viewport" content="width=device-width, initial-scale=1">
</head>
<body>
<div data-role="page">
<div data-role="header"><h1>Zerynth Lamp</h1></div>
<div role="main" class="ui-content" style="text-align:center">
<div style="margin: 3px; float: left;" id="dropDownButton">
<div style="padding: 3px;">
<div id="colorPicker"></div>
</div>
</div>
<button class="ui-btn ui-btn-inline ui-shadow" onclick="ZerynthApp.call('change_color',cur_color.r,cur_color.g,cur_color.b)">Colorize!</button>
<form>
<div data-role="fieldcontain">
<label for="animselect">Animation:</label>
<select name="animselect" id="animselect">
<option value="0">Little Snakes</option>
<option value="1">Spinner</option>
<option value="2">Rainbow</option>
<option value="3">Pulse</option>
</select>
</div>
</form>
<form>
<label for="speedslider">Animation Speed:</label>
<input type="range" name="speedslider" id="speedslider" data-highlight="true" min="0" max="100" value="50">
</form>
</div>
<div data-role="footer">Powered by Zerynth (www.zerynth.com)</div>
</div>
<script>
var cur_color = {r: 0x54, g: 0x9a, b:0x97};
function getTextElementByColor(color) {
    if (color == 'transparent' || color.hex == "") {
        return $("<div style='text-shadow: none; position: relative; padding-bottom: 2px; margin-top: 2px;'>transparent</div>");
    }
    var element = $("<div style='text-shadow: none; position: relative; padding-bottom: 2px; margin-top: 2px;'>#" + color.hex + "</div>");
    var nThreshold = 105;
    var bgDelta = (color.r * 0.299) + (color.g * 0.587) + (color.b * 0.114);
    cur_color.r = color.r;
    cur_color.g = color.g;
    cur_color.b = color.b;
    var foreColor = (255 - bgDelta < nThreshold) ? 'Black' : 'White';
    element.css('color', foreColor);
    element.css('background', "#" + color.hex);
    element.addClass('jqx-rc-all');
    return element;
}
$(document).ready(function () {
    console.log("ready!")
    $("#colorPicker").on('colorchange', function (event) {
        $("#dropDownButton").jqxDropDownButton('setContent', getTextElementByColor(event.args.color));
    });
    $("#colorPicker").jqxColorPicker({ color: "5a9a97", colorMode: 'saturation', width: 220, height: 220});
    $("#dropDownButton").jqxDropDownButton({ width: 150, height: 22});
    $("#dropDownButton").jqxDropDownButton('setContent', getTextElementByColor(new $.jqx.color({ hex: "549a97" })));
    ZerynthApp.jquerymobile_scalecontent();
    $("#animselect").change(function() {
        ZerynthApp.call('change_animation',parseInt($("#animselect").val()));
    });
    $("#speedslider").on('slidestop',function() {
        ZerynthApp.call('change_speed',parseInt($("#speedslider").val()));
    });
});
</script>
</body>
</html>
animation.py
################################################################################
# Zerynth Lamp
# Created by Zerynth Team 2015 CC
# Authors: G. Baldi, D. Mazzei
################################################################################
#Lamp animation functions
from neopixel import ledstrips as neo
import threading

lock = threading.Lock()

# the Zerynth color :)
color = [0x54,0x9a,0x97]
anim = 0
anim_speed = 50
leds = None
layer0 = None
layer1 = None
layer2 = None
npins =0
stopped=False
stopcolor = [0xff,0xff,0xff]

# create all the needed layers
# let's define some coefficients for smooth animation (half a sinus wave)
animation_coefficients = [
    0, 0.2588190451, 0.5, 0.7071067812, 0.8660254038, 0.9659258263,
    1, 0.9659258263, 0.8660254038, 0.7071067812, 0.5, 0.2588190451
]

rainbow = [
    (0xff,0x00,0x00), (0xff,0x7f,0x00), (0xff,0xff,0x00),
    (0x00,0xff,0x00), (0x00,0x00,0xff), (0x4b,0x00,0x82), (0x8f,0x00,0xff)
]

def setup_anim(n):
    global layer0,layer1,layer2,anim
    # fill layers with their initial values
    lock.acquire()
    leds.clear()
    layer2.clear()
    layer0.clear()
    layer1.clear()
    n=n%4
    if n==0:
        layer0[0]=(100,0,0)
        layer0[1]=(100,0,0)
        layer0[2]=(100,0,0)
        layer1[0]=(0,100,0)
        layer1[1]=(0,100,0)
        layer1[2]=(0,100,0)
    elif n==1:
        for x in range(npins//2):
            layer0[x]=(100//(2*x+1),0,0)
            layer1[npins-x-1]=(0,100//(2*x+1),0)
        layer2.clear()
    elif n==2:
        layer1.clear()
        pstep=0
        for x in range(npins):
            step = x*len(rainbow)/npins
            rx = (rainbow[int(step)][0]+rainbow[int(pstep)][0])//4
            gx = (rainbow[int(step)][1]+rainbow[int(pstep)][1])//4
            bx = (rainbow[int(step)][2]+rainbow[int(pstep)][2])//4
            layer0[x]=(rx,gx,bx)
            pstep=step
    elif n==3:
        layer0.clear()
        layer1.clear()
    anim=n
    lock.release()

def setup_anim_speed(n):
    global anim_speed
    anim_speed=n

def setup_color(r,g,b):
    global color
    color[0]=r
    color[1]=g
    color[2]=b

# Create a function to handle background animation
def animate_background(delay):
    global color
    step=0
    while True:
        if (anim==3 or anim==0) and not stopped:
            lock.acquire()
            layer2.setall(int(color[0]*animation_coefficients[step]/2),
                         int(color[1]*animation_coefficients[step]/2),
                         int(color[2]*animation_coefficients[step]/2))
            lock.release()
            step += 1
            if step >= len(animation_coefficients):
                step=0
        else:
            lock.acquire()
            layer2.clear()
            layer2.setall(stopcolor[0],stopcolor[1],stopcolor[2])
            lock.release()
        sleep(delay+500-5*anim_speed)

def animate_foreground(delay):
    while True:
        if not stopped:
            lock.acquire()
            if anim == 0:
                layer0.lshift()
                layer1.rshift()
            elif anim == 1:
                layer0.rshift()
                layer1.rshift()
            elif anim == 2:
                layer0.rshift()
                layer1.rshift()
            elif anim == 3:
                layer0.lshift()
                layer1.lshift()
            lock.release()
        else:
            lock.acquire()
            layer0.clear()
            layer1.clear()
            lock.release()
        sleep(delay+100-anim_speed)

def start(pin,numpins):
    global leds,layer0,layer1,layer2,npins
    npins=numpins
    leds = neo.LedStrip(pin,numpins)
    layer0 = neo.LedStrip(pin,numpins)
    layer1 = neo.LedStrip(pin,numpins)
    layer2 = neo.LedStrip(pin,numpins)
    setup_anim(0)
    setup_anim_speed(50)
    # start the background animation thread
    thread(animate_background,500)
    # start the foreground animation thread
    thread(animate_foreground,50)
    while True:
        # clear leds
        leds.clear()
        # now, acquire the lock
        lock.acquire()
        # merge the first and second layer
        leds.merge(layer0)
        leds.merge(layer1)
        # merge the background layer only where leds is transparent (0,0,0)
        leds.merge(layer2,neo.first_color)
        # release the lock
        lock.release()
        # and light it up!
        leds.on()
        sleep(50)

def stop(r,g,b):
    global stopped, stopcolor
    stopcolor[0]=r
    stopcolor[1]=g
    stopcolor[2]=b
    stopped=True

def resume():
    global stopped
    stopped = False
    setup_anim(anim)
Esquemático

Processo de manufatura
- Propagação de Sinal Elétrico na Velocidade da Luz: Experimento Mental de 186.000 Milhas
- Lanternas a Gás: Evolução, Design e Fabricação Moderna
- Ponteiro Laser: Design, Fabricação e Visão Geral de Segurança
- Lanterna: Da Invenção à Inovação Moderna
- Lâmpadas Halógenas: Tecnologia, História e Futuro — Visão de Especialista
- Semáforos: Engenharia, História e Inovações Futuras
- Do Fogo ao Filamento: Evolução e Produção da Lâmpada Incandescente Moderna
- Construa um Sistema de Monitoramento de Temperatura e Luz Multi-Sensor com Raspberry Pi e DS18B20
- Semáforo Inteligente: Iluminação Pública Adaptativa com IoT
- Sensor de Luz Digital – Acione um LED com Luz Ambiente Usando Windows 10 IoT Core